• Articles coming soon
    • Articles coming soon
    • Articles coming soon
    • Articles coming soon
    • Articles coming soon
    • Articles coming soon
    • Articles coming soon
    • Articles coming soon
    • Articles coming soon
< All Topics
Print

Snipping Tool For Return Labels and Pick Lists

Snipping Tool For Return Labels and Pick Lists

Please use the Snipping tool from Microsoft. There are many to Choose from this is a nice simple one. You can use Snipping Tool to capture a screen shot, or snip, of any object on your screen, and then annotate, save, or share the image.


snip

Snipping Tool

You can capture any of the following types of snips:

  • Free-form Snip.  Draw a free-form shape around an object.

  • Rectangular Snip.  Drag the cursor around an object to form a rectangle.

  • Window Snip.  Select a window, such as a browser window or dialog box, that you want to capture.

  • Full-screen Snip.  Capture the entire screen.

After you capture a snip, it’s automatically copied to the Clipboard and the mark-up window. From the mark-up window, you can annotate, save, or share the snip. The following procedures explain how to use Snipping Tool.

To capture a snip

  1. Open Snipping Tool by clicking the Start button Picture of the Start button. In the search box, type Snipping Tool, and then, in the list of results, click Snipping Tool.

  2. Click the arrow next to the New button, select Free-form Snip, Rectangular Snip, Window Snip, or Full-screen Snipfrom the list, and then select the area of your screen that you want to capture.

To capture a snip of a menu

If you want to capture a snip of a menu, such as the Start menu, follow these steps:

  1. Open Snipping Tool by clicking the Start button Picture of the Start button. In the search box, type Snipping Tool, and then, in the list of results, click Snipping Tool.

  2. After you open Snipping Tool, press Esc, and then open the menu that you want to capture.

  3. Press Ctrl+PrtScn.

  4. Click the arrow next to the New button, select Free-form Snip, Rectangular Snip, Window Snip, or Full-screen Snipfrom the list, and then select the area of your screen that you want to capture.

To annotate a snip

  • After you capture a snip, you can write and draw on or around the snip in the mark-up window.

To save a snip

  1. After you capture a snip, click the Save Snip button in the mark-up window.

  2. In the Save As dialog box, enter a name for the snip, choose a location where to save the snip, and then click Save.

To share a snip

  • After you capture a snip, click the arrow on the Send Snip button, and then select an option from the list.

For more information about Snipping Tool, see Snipping Tool: frequently asked questions. To learn how to take a screen shot using the PrtScn key, see Take a screen capture (print your screen).

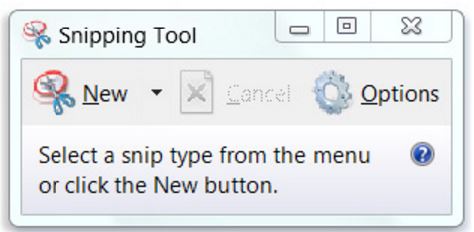
Table of Contents
Palworld: Unleash Your Imagination
PotPlayer: Elevate Your Multimedia Experience
PotPlayer: Your Ultimate Multimedia Hub
Galaxy Swapper: Redefining Digital Transformation
FL Studio: Shape Your Musical Journey
ToDesk: Collaborate Anywhere, Anytime
AutoCAD: Design Beyond Limits
Tekken 8: Unleash Your Fighting Spirit
Autodesk: Innovate and Create
AnyDesk: Your Remote Work Companion
Notepad: Capture Your Ideas with Ease
WeBull: Navigate the Financial Markets with Confidence
TradingView: Gain Insights, Make Informed Decisions
Tor Browser: Explore Anonymously and Securely
Osu: Conquer the Rhythm Universe
Rufus: Your Trusted Bootable Drive Solution