
How to Create a Shipment For Selltec to Use
How to Create a Shipment
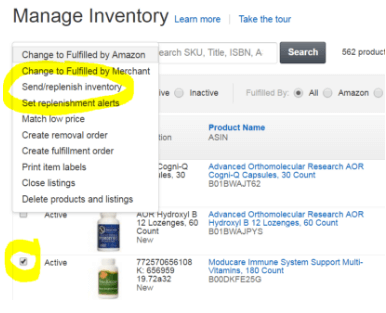
Manage Shipment > Search For item

Check item > Action on Selected ![]() Send and Replenish
Send and Replenish
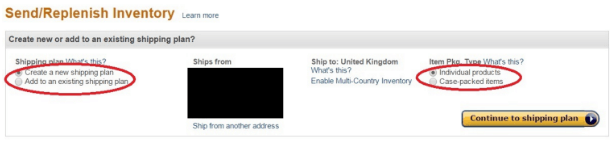
Choose New Shipping PLAN or Add to Existing – Individual products or Case Pack
Make sure the address is correct. > Continue to shipping Plan
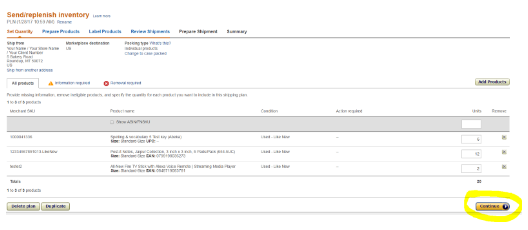
Now you can add Quantity > To add more product to plan you can do so from Add Products button. In the event you cannot find it there please check Manage Inventory

Once you have added all the products to your shipment and input the number of units you’re sending you can move on to the next stage of the shipment process (see below). Click Continue > Seller Prepares


On this page you will see three tabs:
- ‘Prep required’
- ‘Preparation may be required’
- ‘All products’
If your products appear in the “Prep required” tab this means that Amazon have identified that your items will need some additional packaging preparation before being received at the warehouse. The exact steps you need to take will be shown in the “Prep guidance” column.
Click Continue until you get to Review Shipments
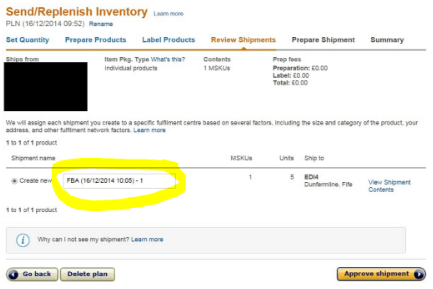
Rename shipment to STP 9/10/16 (current Date)
You can also add to another Shipment if available.

Click Work on shipment
How to Print Pick Slip
Click on – Review and Modify units
Highlight area to print (See image Below)
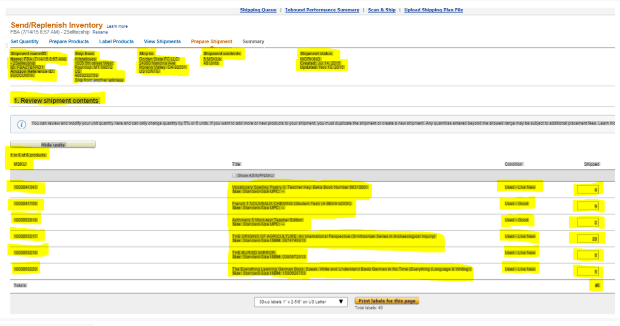
Right Click Print
Please Zoom out with Ctrl – to 50% on some shipments to reduce one or two items on next page.
How to Create A shipment
After making your purchase and having your items shipped to Selltecprep All you need to do is list your items to your Amazon Account. Once Shipping Plans and or Shipments are made we can Ship your items out ASAP. This can be done several ways.
If you use Amazon To List –
- If you would like us to create your shipments
As you buy your items
Just add your products to your Amazon Account See steps 1-6
- If you would like to create your own shipments Follow the instructions below
As your Items Come into Selltec Prep and are added to your Products Tab Please add to a Shipping Plan
This is an absolutely seamless process and should take you about 30 seconds to create each SKU.
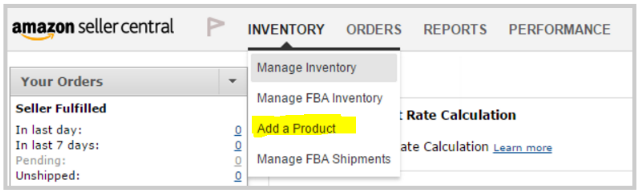
STEP 1
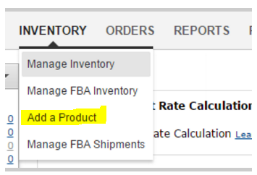
– Navigate to Inventory -> Add a Product from the menu bar.Click add a product in the sub menu of your inventory page.
STEP 2
– Search for your product with a product name, UPC, EAN, ISBN or ASIN and click search.
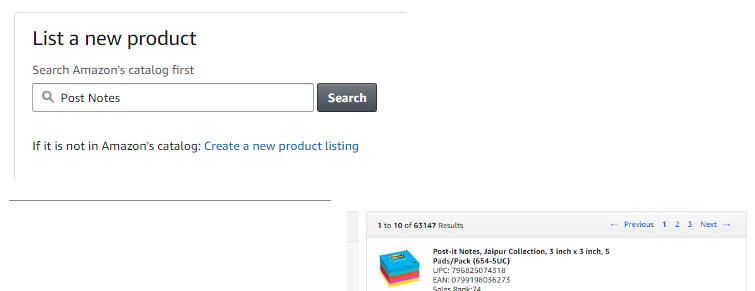
STEP 3
– Choose the correct product.
Make sure the model and color are the same. When you’ve found your product, click Sell yours.
STEP 4
– Set a seller SKU, condition, condition notes and price. Seller SKU are optional.

BOOKS – we suggest you use the SKU to help us keep track of your Conditions. Use the ISBN and the Condition.
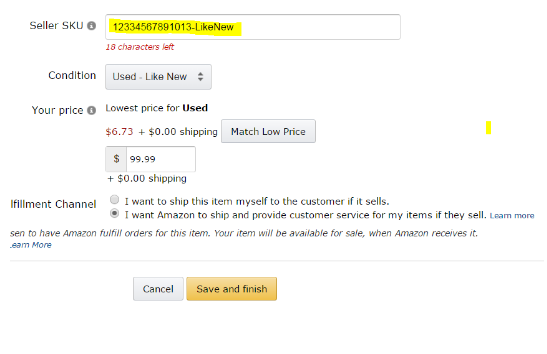
Please Note the Advanced View. If you click this button you can add image of your item. You can also add condition notes here.
STEP 5 – Check that you want Amazon to provide Customer Service for the items.
![]()
Click Save and Finish. You’ll be sent to a new page, but we can ignore that for now since we’ll be sending multiple different products
STEP 6 – Choose Barcode type.
Should always say Amazon Barcode only. – This is the FBA FNSKU Barcode we print to put on your item. Save and Continue.

Note if you are want Selltec to create your shipping Plans and Shipments
STOP HERE and just close your page
Continue only if you want to create your shipments.
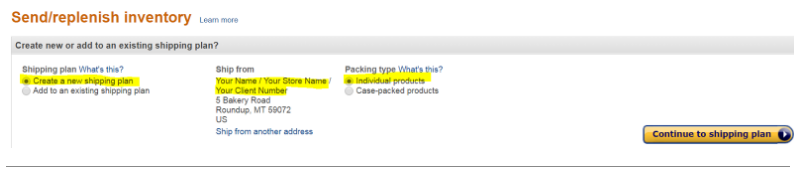
STEP 7 – Create New or Add to an Existing Shipping Plan
On the first item in the shipment Choose Create a New shipping plan. Make sure the Ship From is your Name our address. Most items will need to be Individual products. Click Continue To shipping Plan
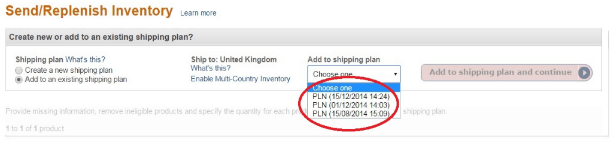
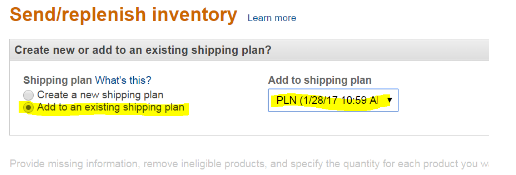
Step 7 part 2 (Not for the first item in your shipping Plan)
If you want to add items to an existing shipping Plan (this is how you get more than one item in a shipment while adding product)
You have made a shipping Plan
Now you are looking at the shipping Plan. You can rename your Plan Selltec or whatever you would like. You will want this name for when we add more add product items items to this plan.
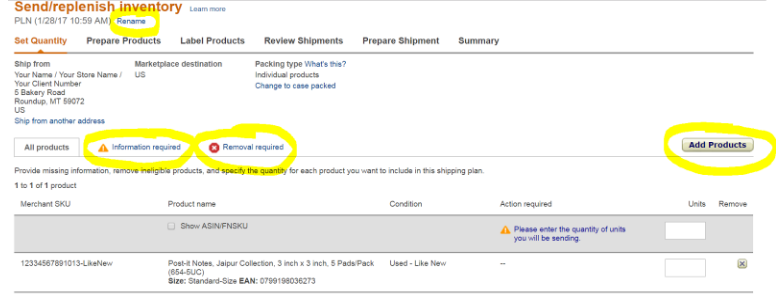
You can click add product and add items to shipping plan that are already in your Amazon account. Just use the Search and click add product Close the pop up when when you’re done adding products.
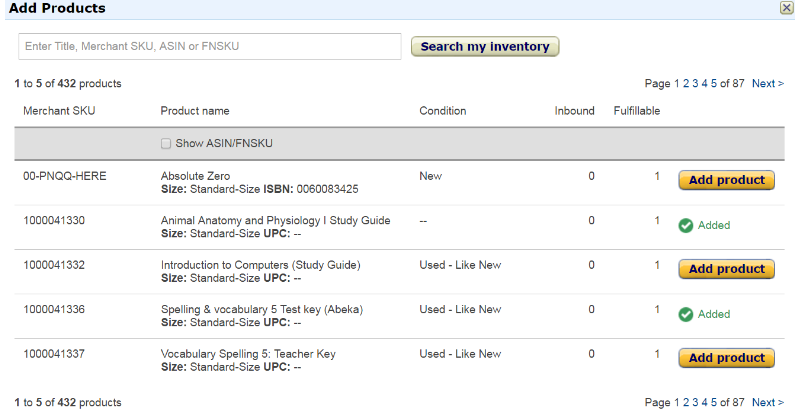
Enter the number of units
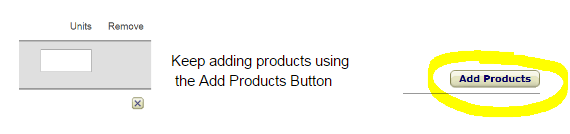
ADDING MORE PRODUCTS USING MENU ADD PRODUCTS.
If you cannot find or don’t have a product listed in your Amazon account you can Add new products to Amazon by following Steps 1-6
But to add more products to this shipping plan take note of the plan name you want to add to. You will need the name Use Step 7 part 2 to add more products to a shipment.
How to make a Shipment
Once your shipping Plan is complete you’re ready to Push into a Shipment. Don’t push into a shipment until you’re ready for Selltec to ship your items.
Prep Required Screen
This screen is where amazon tells you if you have any prep required. Like bagging or bubble wrap.. Amazon does not list all prep they require. Just use this as a guide. You can click through the Tabs to see prep required. Click Continue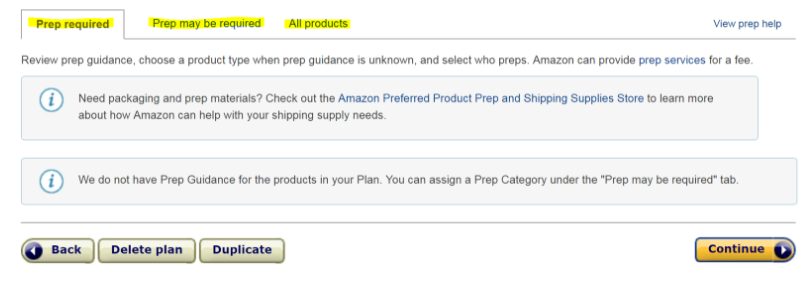
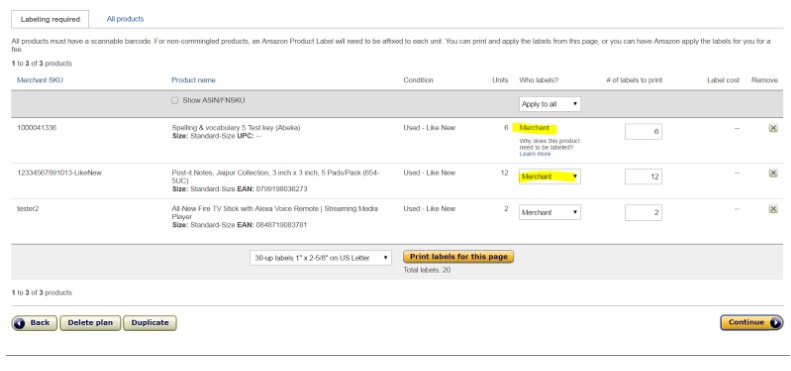
Labeling Required Screen
Please make sure these all say merchant. If it says Amazon you will be charged for Amazon to label your item. Click Continue
Add to Shipment Screen
Here you can see it is splitting the Shipment into two different warehouses. This is where you name your shipment Selltec.

If you already have a shipment you can check the add to existing shipment

Choose the FBA shipment you would like these items to go into. Click Approve Shipment. You have now made a shipment.
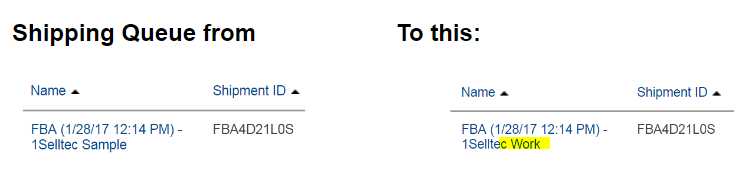
Note Do not add your shipment to an order that Says Working in the title. These Working shipments in the title have already been printed and are being prepped at Selltec.

Go to your Selltec Click Shipment Ready Button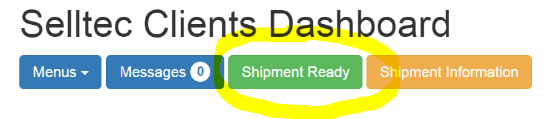
You will know when we have printed your shipment and started working on it. Your title will change on your Amazon
 \
\
You will also be able to see when we have added your items to prep department By clicking on your Shipment Information button.
As your Items Come into Selltec Prep and are added to your Products Tab Please add to a shipping Plan
If you use Inventory Labs
Go to Settings > Ship From Information > Add > Add the Selltec Address
Client Name / Amazon User Name
5 Bakery Road
Roundup MT
59072-2747
List> New Batch
Add Selltec to the Batch name and Change the Ship from another address to the Selltecprep address you just created.

The Workflow type is completely up to you. If you do live we can grab the shipment at anytime without needing you to send feeds. But if you’d rather control when we ship you can do private. And in some cases you may want to do private and have Selltec send the Inventory feeds just let us know which way works best for you.
Create the new Batch > List your items
When you’re ready Send your Product Feeds
Send your shipments. We will take it from There.